One of my lifelong passions is drawing. I love to draw and teach others how to draw. The following tutorials cover some of the basics of design drawing.
TWO POINT PERSPECTIVE
Two Point Perspective is a drawing technique where the sides of an object vanish to one of two vanishing points. The vertical lines of the object do not have perspective applied. This tutorial demonstrates how to draw a cube in two point perspective.
Step 1: Draw the horizon line
Step 2:Establish a left vanishing point and a right vanishing point
Step 3: Draw a vertical line to establish the height of front edge of the cube. The established height determines the size of the cubes - a tall line creates a larger or taller cube.The placement of this line (above, below, or at the horizon) establishes the visible surfaces of the cube. If you draw the line below the horizon you see the top of the cube. If you draw it in the center of the horizon line you only see the sides. If you draw it above the horizon line, you see the bottom of the cube.
Step 4: Connect the bottom edge of the cube to the left vanishing point and the right vanishing point
Step 5: Connect the top edge of the cube to the left vanishing point and the right vanishing point
Step 6: Draw two vertical lines to establish the depth of the cube. Use your best judgement to estimate the depth. It is difficult to determine exactly how far back in space the vertical lines should be. There is a mathematical equation but often a best guess is more than adequate. A good rule of thumb is to place these outer lines about 2/3 the vertical height of the center line.
Step 7: Connect the top point of the back edges to left vanishing point and right vanishing point
Step 8: Connect the bottom point of the back edges to left vanishing point and right vanishing point. This will allow you to check the accuracy of your cube.
Multiplying and dividing cubes
This tutorial will cover how to multiply and divide cubes in perspective. Start with a perspective drawing of a cube.
Step 1: Draw two diagonal lines to locate the center of the right face of the cube. Draw a line from the center of the cube face to the right vanishing point. This line will intersect the midpoint of the right edge of the cube.
Step 2; Draw a line from the bottom corner of the right face of the cube through the midpoint of the right edge.
Step 3: Draw a vertical line at the intersection of the midpoint line and the top cube edge
Step 4: Connect the top edge of the cube to the left vanishing point.
Step 5: Darken in the outline of the cube.
Step 6: Apply this same method to multiply cubes on the left side, top, or bottom of the original cube.
Ellipses in perspective
There are two key elements of any ellipse, the minor axis and the major axis. As an ellipse moves above or below the horizon line, the width of the major axis does not change. However, the height of the minor axis compresses as it moves closer to the horizon line.
ellipses in cubes
Step 1: Construct a cube in perspective.
Step 2: Draw diagonal lines to find the center of the right face of the cube. Draw a line from the center of the right face of the cube to the left vanishing point.This will be the minor axis of the ellipse.
Step 3: Draw a line intersecting the center of the right face at a 90 degree angle to the minor axis. This line will be the major axis. Use these axis as your guidelines for constructing the ellipse.
Use this same method to construct ellipses on any face of a cube.
Revolves
Revolves are forms with a profile path revolved around an axis. Common examples are vases and bottles.
Step 1: Think about the type of shape you want to create. Picture the profile or side view of the form. For this example we will create a vase. The profile looks like this:
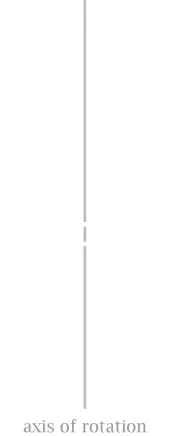
Step 2:Draw a vertical line. This line will be our axis of rotation.
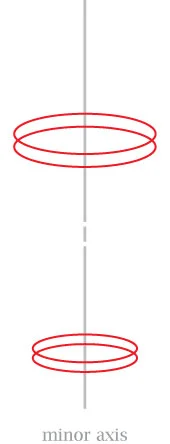
Step 3:Draw some ellipses to indicate the top and bottom edges of the form. Notice how the minor axis of the ellipse are vertically aligned with axis of rotation.
Step 4:Draw the side profile of the vase.
Step 5:Mirror the side profile on the other side.
Step 6:Use shading to complete the form.
sweeps
Sweeps consist of two elements: a profile and a path. The profile is "swept" along the path.
Step 1: Draw two paths in perspective.
Step 2:Draw the front profile of the form.
Step 3:Draw the lower edges of the form.
Step 4:Draw the side edges of the form.
Step 5:Draw arcs to indicate the top and bottom surface of the sweep.
Step 6:Use shading to complete the form.
boolean forms
Boolean forms are created when a form is added to or subtracted from another form. In this example, we will use cirles and ellipses to create a combined form and a subtracted form.
Step 1: Draw a large circle
Step 2: Draw a small circle intersecting the large circle.
Step 3:Draw a line connecting the two center points of both circles.
Step 4:Draw an ellipse at the intersection of the two circles. The minor axis of the ellipse will be aligned with the center point line from step 3.
Step 5:Use shading to indicate a combined form.
Step 6:Use shading to indicate a subtracted form.


